The short answer (first 5 minutes)
Load a Cessna 172 at an airport you recognise, set clear skies and midday, start on the runway rather than cold and dark, and go fly. Do not touch career mode. Do not open the graphics menu. Push the throttle up, pull back at 55 knots, climb to a few thousand feet, make some turns, and come back and land. That is your first flight, and it takes about fifteen minutes.
Everything else in this post is the reasoning behind that paragraph, and the twenty hours that come after it. We lead with it because most MSFS 2024 guides for absolute beginners stop the moment you are airborne, leaving you at 3,000 ft with no idea what to do next. The hard part of this hobby is not installing it. The hard part is that nothing is asking anything of you once you are in the air, so nobody tells you what good looks like.
A note on why the runway start matters: cold and dark is genuinely fun, but it is a separate skill from flying, and doing both at once means you will spend forty minutes on switches and then bounce the landing you were actually there to practise. Learn to fly first. Learn the switches on flight two. If you want to browse what else is in the hangar before you commit, the full MSFS 2024 fleet is there, but the answer for today is the 172.
Before you fly: the three things that actually matter
Most of the settings in this sim do not matter yet. Three do.
You need an internet connection, permanently
MSFS 2024 streams its world data rather than shipping it on your drive, which is why the base install is roughly 30 GB against the 2.5 petabytes of world data sitting behind it. There is no offline mode: with no connection you get a grey screen and some music. There is a configurable rolling cache that keeps recently visited areas, but it caches where you have been, not where you are going, so it is not a substitute. Drop your connection mid-flight and at best the scenery degrades, at worst the sim goes to desktop.
The practical version: if you fly on hotel wifi or a metered connection, know this before you buy, not after. Cost-wise, the Standard edition sits around $70 at list price and discounts often, and it is on Game Pass. Standard is fine. The pricier editions add aircraft you are not ready for.
Assists: which to leave on, which to turn off on day one
Turn off the assists that fly the aircraft for you: auto-rudder is the big one, along with anything labelled assisted takeoff or assisted landing. These feel helpful and are the single biggest reason people plateau, because the sim is quietly correcting the exact input you are trying to learn.
Leave on the ones that fix information you cannot get through a monitor: labels for airports and traffic, and any tooltip that tells you what a switch is when you hover it. You are missing peripheral vision and the seat of your pants. Compensating for a monitor is not cheating. Having the sim step on the rudder for you is.
Controls: why a cheap twist-grip stick beats a keyboard
You can fly MSFS 2024 on a keyboard. You should not. Roll and pitch are analogue and continuous, and a key is a switch: it gives you full deflection or nothing, which is exactly the input a beginner already over-applies. A mouse-driven yoke is better but still awkward.
The cheapest thing that genuinely works is an entry-level twist-grip joystick: pitch and roll on the stick, rudder on the twist, and a throttle lever on the base. That covers every control the 172 needs. You do not need a yoke, you do not need pedals, and you certainly do not need a HOTAS with sixty buttons for an aircraft that has one lever and a knob. A yoke is more authentic for GA and pedals matter once you are chasing crosswinds seriously, but both are upgrades to a working setup, not entry requirements. We will cover specific hardware in a dedicated gear guide rather than here.
Why the Cessna 172 is the standard answer
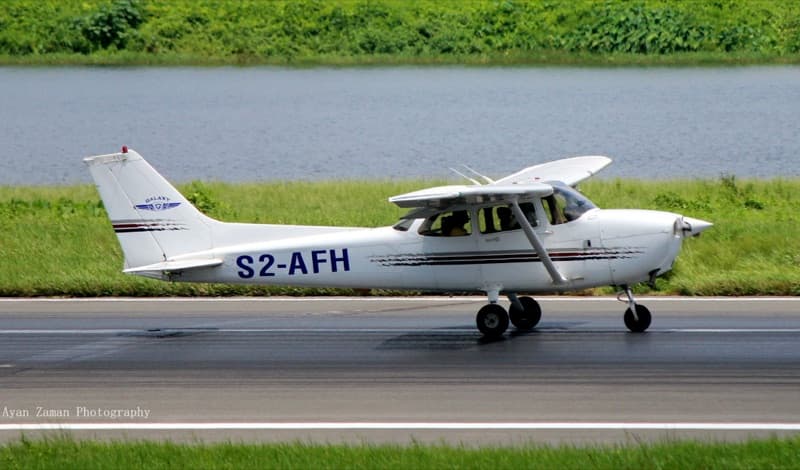
The 172 is the most produced aircraft in history, with over 44,000 built since 1956, and it is the go-to trainer worldwide for the same reasons it is the right answer in the sim.
What "forgiving" actually means
Forgiving is not marketing. It is a list of things that cannot go wrong. The gear is fixed, so you cannot land gear-up. The prop is fixed-pitch, so there is no prop lever to mismanage. The engine is a single 180 hp Lycoming IO-360-L2A with a throttle, a mixture control and carb heat, which is the entire systems knowledge required. There is no pressurisation, no hydraulics, no bleed air, no flight management computer, and nothing that will bite you thirty minutes after you got it wrong.
It also flies slowly, and slow is the single most valuable property in a trainer. Everything happens at a pace where you get to think, notice you are wrong, and fix it. Ceiling 13,500 ft, range 696 nmi, cruise around 2200-2500 RPM burning roughly 8 gallons an hour. None of those numbers will surprise you mid-flight.
The 152 vs the 172: when the smaller one is the better choice
The in-sim Flight Training lessons use the Cessna 152, which covers taxiing, takeoff, in-flight manoeuvres, navigation and landing. The 152 is a two-seat trainer with a 110 hp Lycoming O-235-L2C, and it is slower and lighter still than the 172. If you find the 172 arrives at the runway threshold faster than your brain does, drop to the 152 for a few hours. It is the same aircraft with the volume turned down. Its range is only 408 nmi, so it is a worse cross-country machine, which is why most people end up back in the 172 by hour ten.
Why starting in an A320 fails
Here is the specific way it fails, and it is not what people expect: nothing breaks. You will get an A320 into the air on your first try. Autopilot on at 1,000 ft, managed climb, it flies the route, and it will very nearly land itself. It looks like success.
What you have actually done is watch an aircraft fly while you pressed buttons in the right order. You have learned a procedure, not a skill. Then the autopilot disconnects, or the wind is 20 knots off the runway heading, and you discover you cannot hand-fly, because you never have. The 172 fails loudly and immediately, in ways you can see and fix in fifteen minutes. That is the point of it.
Your first flight, step by step
The runway start
Free flight, C172, an airport you know, clear skies, midday, start on the runway. Skip the checklist entirely for flight one. Flaps up, trim set, you are lined up already.
Takeoff
Hold the brakes, throttle full open, release. Keep the nose straight with rudder, which will need more right foot than you expect. At 55 KIAS ease back on the stick and let the aircraft fly itself off. Do not force it off the ground early. Once you are climbing, hold 70-80 KIAS, which is Vy, the best rate of climb. If you had a hill in front of you, 62 KIAS is Vx for obstacle clearance, but today just hold 70-80 and let the altimeter wind up.
Straight and level, then turns, then back to the field
Level off at 3,000 ft and pull the throttle back to about 2300 RPM. Now trim: roll the trim wheel until the aircraft holds altitude with no pressure on the stick. This is the moment beginners skip and then wonder why hand-flying feels exhausting. Trimmed properly, the 172 flies itself.
Then turns. Roll to about 20 degrees of bank, hold it, roll out on a heading. Notice the nose wants to drop in the turn and that a little back pressure fixes it. Do a few in each direction. That is the entire lesson. Then point back at the airport.
The landing
Enter the pattern at around 1,000 ft above the field, throttle back, flaps in stages as you slow. On final you want 65-75 KIAS, and if it is gusty add half the gust factor. Flaps full gives you the shortest landing; use less in gusty conditions.
Aim to touch down on the main wheels first, then hold the nose off and lower it gently as you slow. If you plant the nosewheel first you will bounce, every time. Brake as little as you need to.
Your first landing will be bad. So was everyone's.
Learning to read the panel (the six-pack)
The scan: the attitude indicator is home base
Six instruments, one habit. The attitude indicator in the centre is home base: your eyes live there, and every other instrument is a quick check before you come back. Attitude, airspeed, attitude, altimeter, attitude, heading. New pilots stare at one gauge, chase it, and lose everything else.
The four you actually need on flight one
Airspeed indicator, attitude indicator, altimeter, heading indicator. That is it. Airspeed tells you if you are about to stop flying, attitude tells you which way is up, altimeter tells you how much room you have, heading tells you where you are pointed. Ignore the rest for now.
The two beginners misread
The vertical speed indicator lags. It tells you what was happening a couple of seconds ago, so if you fly the VSI you will chase it into a porpoise. Set the attitude, let the VSI confirm it.
The heading indicator drifts. It is a gyro, not a compass, and it wanders off over time. Realign it to the magnetic compass every 15 minutes in cruise, in straight and level flight, which is why that is a step in our cruise checklist rather than a footnote.
G1000 vs steam gauges
Worth knowing before you load in: the 172 ships as two variants in the aircraft selector. One is the G1000 glass cockpit, with two big screens instead of round dials. The other is the Classic, which is where the steam-gauge six-pack described above actually lives. If you loaded in and went looking for round instruments and found screens, that is why.
The good news is it is the same six instruments in a different arrangement. The G1000 draws airspeed as a tape down the left, altitude as a tape down the right, attitude as the whole background, and heading as a compass rose at the bottom. Same information, same scan, same aircraft. Pick either. Just know which one you are in.
Your second flight: the cold and dark start
Now do it properly. Cold and dark, same aircraft, same airport, engine off and every switch dead.
The spine of a C172 start
Parking brake set. Fuel selector BOTH, and never start on a single tank. Master switch on, both ALT and BAT. Beacon on. Mixture RICH, full forward. Carb heat COLD, pushed in. Primer 2-3 pumps on a cold engine, then locked. Throttle open a quarter inch. Check the prop area is clear. Ignition to START, then release to BOTH. Then watch the oil pressure and check it is green.
Two limits worth internalising: do not crank for more than 10 seconds, and wait 30 seconds between attempts. And if you do not have oil pressure within 30 seconds of the engine catching, shut it down immediately. The sim will let you ignore both. The habit is the point.
After that comes the run-up at 1800 RPM: magnetos right, left, then both, with a maximum 125 RPM drop per magneto and no more than 50 RPM difference between them. Suction gauge 4.5-5.4 in Hg. Then taxi out no faster than a brisk walk, and test the brakes within the first few feet of movement rather than discovering they do not work at the hold short line. The full interactive Cessna 172 checklist covers all of it phase by phase with the exact switch names, including the shutdown, where mixture CUTOFF is what actually stops the engine and avionics come off before the master.
The three steps beginners get wrong
Fuel selector BOTH, mixture RICH, carb heat COLD. In that order of frequency. Miss the fuel selector and it may start and then quit later. Leave the mixture lean and it will not start at all. Leave carb heat on and you are feeding the engine warm unfiltered air and losing power on takeoff.
If you want to go further on the ground, our weight and balance calculator handles the pre-flight side. Max ramp weight on the 172 is 2,558 lbs, and it is easier to bust than people think with four adults and full tanks.
The next 20 hours: a path that works
Hours 1-5: pattern work at one airport
Pick one airport and stay there. Take off, fly the pattern, land, repeat. Do it twenty times. This is boring and it is the single highest-value thing you can do, because landing is the only part of flying with no margin for being approximately right.
Once you are landing consistently in calm air, add wind. Start at 5 knots off the runway heading and work up. Our crosswind calculator turns a wind report into the actual crosswind component, which is how you know whether you just handled 6 knots or 18.
Hours 5-15: cross-country VFR, real weather, navigation
Now leave the pattern. Plan a flight to an airport 50-100 nm away, navigate by looking out the window and at the heading indicator, and land somewhere you have never been. Plan fuel properly: about 8 GPH, plus a 30-minute VFR reserve, or 45 minutes at night.
Then turn on real weather. This is the step that makes the sim feel like a place rather than a game, and it is when METARs stop being noise. Our METAR decoder turns the raw string into plain English while you learn to read them yourself, which takes about two weeks of doing it before you stop needing help.
Hours 15+: the step up
By now you can take off, navigate, and land in weather, in one aircraft, without assists. That is a real skill and it transfers to everything else. This is where you get to choose: more GA, a turboprop, or an airliner.
When to move to an airliner (a real test, not a vibe)
The five-item readiness checklist
This is our editorial call, not an industry standard. But if you can honestly tick all five, you will enjoy the airliner instead of fighting it.
- You can land the 172 in a 10-knot crosswind without assists, consistently, not once.
- You can start it cold and dark without reading a checklist line by line.
- You can fly a cross-country in real weather and arrive with the fuel you planned.
- You can read a METAR without a decoder.
- You can plan a descent, meaning you know roughly where to start down to arrive at the right altitude. Our descent calculator gives you the number, but the point is knowing you needed one before the sim tells you.
Point five is the real filter. GA flying forgives you for being late on the descent; an airliner does not, and "why am I 6,000 ft too high" is the single most common airliner beginner's complaint.
The intermediate step everyone skips
There is a whole class of aircraft between the 172 and a jet, and it is the best value in the hobby. A turboprop gives you a real autopilot, glass avionics, and flight-level flying, without the systems depth of an airliner. The TBM 930 is a single-engine rocket that will teach you altitude and speed management honestly. The King Air 350i is slower, has two engines to manage, and is closer to a small airliner in workflow.
Fly one for ten hours and the jet will feel like a bigger version of something you know, rather than an alien spacecraft.
Which airliner first
Start with an A320 family aircraft over a study-level 737. The default A320neo is approachable and gets you flying the workflow in an evening. When you want depth, the free FlyByWire A32NX is study-level and costs nothing, which makes it the best-value first airliner in the sim by a distance.
The Airbus philosophy helps here too: the flight envelope protections and the managed modes mean the aircraft cooperates while you are learning the FMS. A PMDG 737 is a magnificent piece of software and it will simulate your mistakes faithfully rather than protecting you from them. Buy it second.
Common beginner mistakes
Buying the study-level aircraft first
The most detailed aircraft is the worst first aircraft. Depth of simulation is only valuable if you know what is being simulated.
Treating career mode as flight school
Career mode is a progression system wearing a flight school costume. It is structured as a licence ladder paid for in credits: PPL at 2,000, CPL at 2,500, instrument rating at 10,000, ATPL at 40,000, and a jet rating at 100,000 on top. That is an economy, and it is designed to keep you flying jobs to earn currency, which is a perfectly good game loop.
What it is not is instruction. The training flights are recycled from the previous sim, they are scattered randomly around the globe, the game does not clearly tell you they are required, and independent coverage is blunt that there is no real additional instruction in them despite the "tutorial" label. You can also skip all of flight training entirely and still climb the ladder, which tells you what the ladder is actually measuring. Even the PPL exam, unlocked under Headquarters then Certifications, is a simple pattern and landing.
Fly career mode because grinding a career is fun. Do not fly it expecting to be taught. If you want structured lessons, the in-sim Flight Training activities with the virtual instructor are the closer thing, and they at least sequence taxiing, takeoff, manoeuvres, navigation and landing in an order that makes sense.
Chasing graphics settings instead of flying
Hours in the settings menu are not hours in the air. Set it once to something that holds a stable frame rate on the ground at a big airport, which is the worst case you will meet, then leave it alone for twenty hours. Tuning is a thing you can do once you know what you are looking at, and on day one you do not.
Over-controlling
Everyone's first inputs are far too large. The 172 wants gentle pressure, not deflection. If the horizon is moving faster than you intended, you are using too much stick. Halve it. Then halve it again.
Never touching the trim
Trim is not a nicety, it is how you remove the force you are holding all flight. Untrimmed, you fight the aircraft constantly, get tired, and conclude the sim flies badly. Trim after every power or configuration change: climb, level off, descent, approach. It is the single biggest difference between people who look smooth and people who do not.
FAQ
Do I need MSFS 2020 as well?
No. MSFS 2024 stands alone. If you already own 2020 there is no requirement to keep it installed.
Can I use this to train for a real PPL?
As a supplement, genuinely yes: procedures, radio work, instrument scan, and navigation all transfer, and real students use sims for exactly this. But home flight simulation is a valuable supplement, not a replacement for real-world instruction. It cannot teach you what the aircraft feels like, and that turns out to be most of learning to fly.
The path is short: 172, runway start, fly the pattern until it is boring, then go somewhere. Everything else is optional for a long time. When you are ready to do it properly, the Cessna 172 checklist is the place to start flight two.